The Easy Way to Improve Your Rhythm Without Struggling
The Easy Way to Improve Your Rhythm Without Struggling
Are you ready to take your rhythm guitar playing to the next level? Many guitarists overlook the importance of rhythm, but having a solid groove is what sets great players apart. In this lesson, I’ll break down a simple yet effective riff, teach you how to practice rhythm techniques, and show you how to create a groovy solo using just a few notes. Let’s dive in!
Master Hybrid Picking for Better Rhythm Control
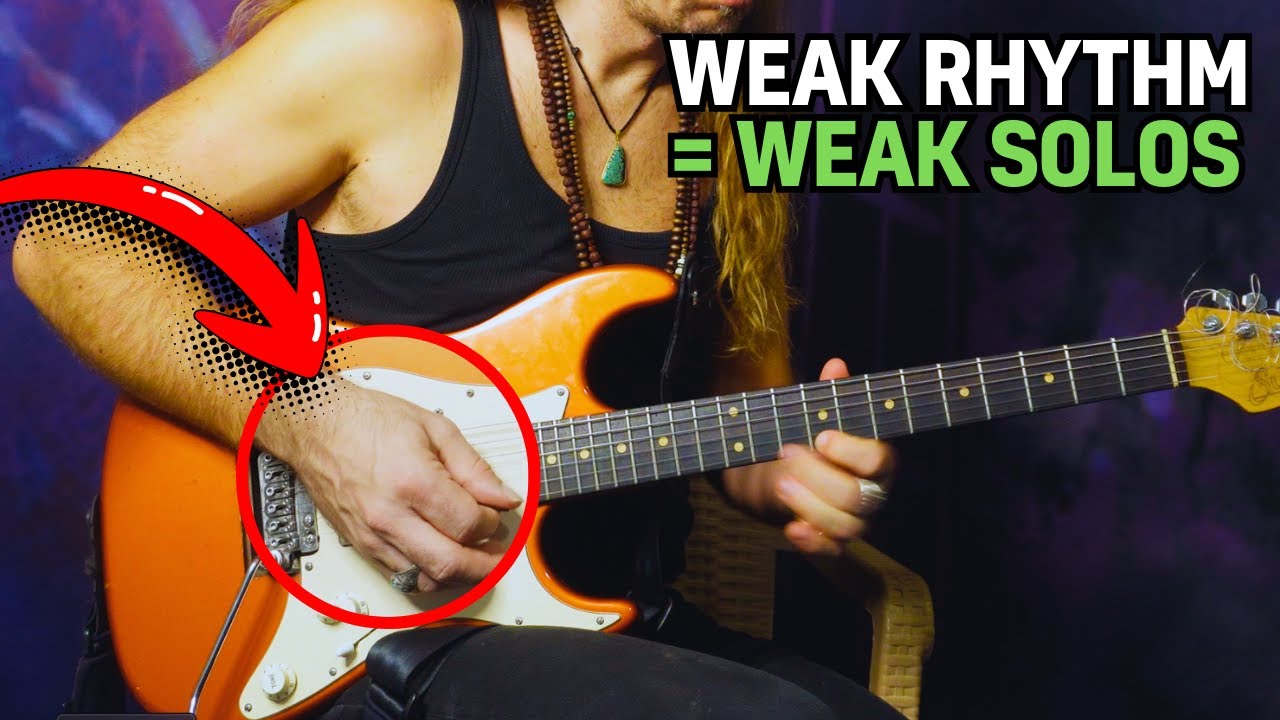
Hybrid picking is a game-changer for rhythm guitarists. It enables you to combine the precision of a pick with the versatility of your fingers, giving your playing a unique texture and groove. Here’s how to get started:
- Hold your pick between your thumb and index finger.
- Use your middle, ring, and pinky fingers to pluck additional strings.
- Focus on creating a backbeat slap rhythm by muting the strings with your left hand while practicing the picking motion.
If hybrid picking feels tricky at first, don’t worry—it’s all about muscle memory. Start slow, muting the strings with your left hand, and concentrate on the rhythmic motion. Over time, you’ll develop the coordination and control needed to add that groovy percussive feel to your playing.
Develop Chord Switching with Muting Techniques
Rhythm guitar isn’t just about strumming—it’s about precision and tone. For the riff in this lesson, you’ll use two main chords: A major and D with A in the bass. To make these chords sound clean and professional, you’ll need to master muting techniques:
- Mute the low E string to avoid unwanted bass notes.
- Mute the high E string with your index finger for a cleaner sound.
- Experiment with hammer-ons in your left hand to add elegance to the chord transitions.
Once you’ve got the hang of the A and D chords, practice switching between them while maintaining a steady rhythm. Pay attention to the small details, like how your fretting hand moves and how your strumming hand emphasizes the groove. Precision and repetition are key!
Create Groovy Solos with Just Three Notes
You don’t need dozens of fancy scales to create a compelling solo. In fact, for this exercise, we’ll focus on just three notes: F#, E, and the root note of your riff. The goal isn’t to impress with speed or complexity—it’s to nail the rhythm and feel of your solo.
Start by looping the riff using a simple one-button looper pedal. Once the loop is playing, experiment with these three notes:
- Focus on rhythmical placement—try playing on the beat, off the beat, or with syncopation.
- Work on your dynamic control by varying the intensity of your picking.
- Create subtle variations to keep the solo interesting while staying locked into the groove.
This exercise is harder than it sounds! But once you master it, you’ll find that your solos have more character and rhythmical depth. Remember, playing rhythmically is more important than shredding fast leads.
Show Off Your Progress and Win a Private Lesson
Want personalized feedback on your playing? Here’s a challenge: Record yourself playing the riff and solo from this lesson, and send it in! I’ll listen to your recording and provide feedback. Plus, I’ll select two participants to receive a free private lesson with me.
Ready to finally break through your plateau? Apply for a free strategy session and let's map out your path to guitar freedom.